|
|
|||||||||||||||||||||||||||||||||||||
|
TABLE OF CONTENT:
|
|||||||||||||||||||||||||||||||||||||
|
The fisrt thing you need to do is to extract the .pf file with the pfextract utility that comes with DTR. This will open up all the files needed to create and paint new cars. Make sure your data is all moved to you DTR directory (this is available in the Full Version only). Note : You can skip this step by using one of our painted car to start from. |
|||||||||||||||||||||||||||||||||||||
|
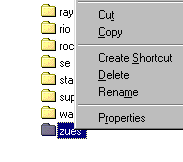
The easiest way to get new paint jobs into DTR is to add new chassis to the list. 1. Find an existing chassis that you would to use to a base for your new chassis. In this case I chose to use the Zues.
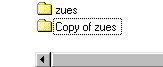
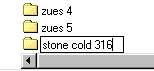
2. Go to your ..../Dirt Track Racing/data/cars/ folder and locate the zues folder. Then in this case you would copy and paste the zues folder. Next you rename the copied folder to the name of your new chassis. We will name ours the austin chassis.
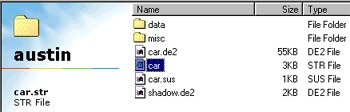
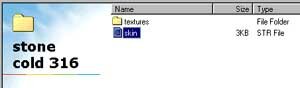
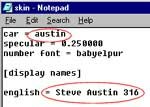
3. After renaming your chassis folder, you need to open it. In there you will find a file named car.str.
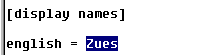
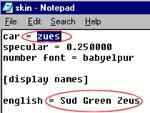
Right Click on this file and open it with notepad. You need to edit a few lines in this file. The first line you need to edit is the [display names] line. Change the name of the chassis (zues) to whatever the new name is going to be (austin).
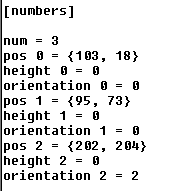
The next lines need to be changed only if you don't want DTR to put its #'s on the car. Scroll down and find the [numbers] section. Locate the 3 lines that say height 0, 1, 2. Change the value of these to zero.
Now close it up. Nothing else should be changed in this file. You've just added a new chassis to DTR. |
|||||||||||||||||||||||||||||||||||||
|
|||||||||||||||||||||||||||||||||||||